Wednesday, September 5, 2012

Chili-Rubbed Pork with Corn Salsa - Williams-Sonoma

Ingredients:

  • 2 pork tenderloins, about 1 1/2 lb. total
  • 2 Tbs. olive oil
  • Salt and freshly ground pepper, to taste
  • 2 tsp. ancho chili powder
  • 1 cup fresh or thawed frozen corn kernels
  • 3/4 tsp. ground cumin
  • 1 small yellow onion, chopped
  • 1 large tomato, seeded and chopped
  • Juice of 1 lime
  • 3 Tbs. chopped fresh cilantro 

Directions:

Preheat an oven to 425°F.
Rub the pork tenderloins with 1 Tbs. of the olive oil. Season generously with salt and pepper, and sprinkle with the chili powder.
In a large fry pan over medium-high heat, warm the remaining 1 Tbs. olive oil. Add the pork and brown on all sides, about 5 minutes total. Transfer the tenderloins to a shallow roasting pan just large enough to hold them. Reserve the fry pan and drippings.
Transfer the pork to the oven and roast until an instant-read thermometer inserted into the center registers 145° to 150°F and the meat is barely pink in the center, 15 to 20 minutes. Transfer the pork to a carving board, cover loosely with aluminum foil and let rest for 10 minutes.
Meanwhile, add the corn and cumin to the drippings in the fry pan and set the pan over medium-high heat. Cook, stirring, until the corn is lightly browned, 3 to 4 minutes. Remove from the heat and stir in the onion, tomato, lime juice and cilantro. Season with salt and pepper.
Cut the pork into thin slices and serve with the warm salsa. 

I served this with pre-made crescent rolls and sweet potato fries. For the sweet potatoes: I peeled them, cut them into fry size, put them on a rimmed sheet, sprinkled them with olive oil, pepper, and salt. I cooked them at 425 for about 25 minutes with the pork.

I was really excited to make this, because I've never cooked with pork loin before. My mom and Aunt have, it always turned out well so I was ready to take on the challenge! I went out and bought an inexpensive meat thermometer, I wanted to make sure the pork was cooked enough. I kept checking it and, of course, the thermometer didn't work. Knowing that our oven range is not quite as hot as it should be, I cooked it longer. It was slightly annoying and I will be sure to buy a mid-priced item next time, but the pork and corn salsa came out delicious! Brad had seconds which is always a good sign :)

Tuesday, August 28, 2012

An Update

As many of you know, I up and left New Hampshire for the sunnier side of life in San Diego. While today itself is not turning out to be a literal sunny day, I am enjoying it out here. I am still looking for a full time job, but in the meantime I have been cooking for my boyfriend, Brad, and our roommate, Nick.
Many of you know I drove my car across country and my main concern for packing my car (clothes aside) was making sure I could fit all of my kitchen equipment in the car. I knew that Brad didn't cook moving out here and we had several phone conversations which went like this: me - do you have (enter anything you could think of)? Brad - nope.  While I drove everyone crazy with my neurotic packing of kitchen supplies, I am glad I brought it. Not working and being new to an area is a little more difficult than I anticipated. The good news is that I am enjoying making food for Brad and Nick. Sometimes they look at what I've made and ask questions of, "now what is this?"but they seem to enjoy everything and are happy to not have to worry about dinner. Plus I've saved them tons of money in not eating out every night.
I have made some new dishes which I will definitely be posting soon. For the most part I've made food I've already posted to the blog - Pesto Presto Chicken, Mexican Stuffed Shells, Spinach and Artichoke Mac & Cheese, Beef and Broccoli Stir Fry, and Gazpacho Pasta. Brad's two favorites are Mexican Stuffed Shells and Pesto Presto Chicken. Mexican Stuffed Shells are inexpensive and easy to make, I've made them a few times. So far its been full, happy stomachs and I don't have to do dishes afterwards, which is pretty awesome.
I will definitely be updated my blog with some new things I've made. Please comment about anything you've tried from the blog, add what you thought and what you might've changed. Keep cooking :)

Sunday, July 1, 2012

Spice-roasted Cauliflower with Artichokes + Salmon - Food Network

Spice-Roasted Cauliflower with Artichokes

Ingredients

  • 1 head cauliflower, cut into bite-size florets
  • 1 pound Jerusalem artichokes, cut into 1-inch dice
  • Extra-virgin olive oil
  • Kosher salt
  • 1 tablespoon cumin seeds, toasted and ground
  • 1/2 teaspoon cayenne pepper
  • Finely chopped fresh chives, for sprinkling

Directions

Preheat the oven to 375 degrees F.

In a large bowl, combine the cauliflower and Jerusalem artichokes; toss them generously with olive oil and salt.

In a small bowl, combine the cumin and cayenne and add to the vegetables. Toss well to thoroughly combine.

Spread the veggies on a baking sheet in one even layer-use two baking sheets, if necessary. Roast 20 minutes, then stir the veggies so they have the chance to brown all over and rotate the pan to ensure even cooking. Roast another 20 minutes, then stir and rotate again.

Roast the vegetables for an additional 5 to 10 minutes, or until they are brown, tender and smell wonderful-almost like popcorn. If they aren't lovely and brown, let them continue to roast for another few minutes. Taste and adjust the seasoning, if necessary.

Remove the veggies from the oven, sprinkle with chives and transfer to a serving dish. Serve immediately.

Salmon - I seasoned the Salmon with Old Bay Seasoning. I cooked in a pan with extra-virgin olive oil for about 8-10 minutes. About half way through cooking I added fresh lemon juice from half a lemon.

I saw the cauliflower recipe in Food Network Magazine and knew immediately that I was going to make it for today. I did make some changes.
First being that I used regular artichokes because I figured they were the same thing. After researching Jerusalem artichokes on Wikipedia, they are not the same thing (they also aren't from Jerusalem). In fact, they aren't really even close to being the same thing. So I'm not really sure how much this impacted the recipe other than I really really really like regular artichokes and I thought they tasted great.
Second, I hate toasting something and then grinding it up when it already comes in spice form. I used cumin spice, 2 teaspoons. It was plenty spicy and if you are worried about the flavor being too much, you could definitely get away with using less.

One more Sunday dinner in NH...


Sunday, June 24, 2012

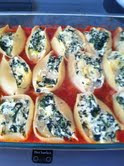
Spinach and Artichoke Stuffed Shells- Rachael Ray

Ingredients

  • 20 large pasta shells
  • 1 can whole plum tomatoes (28 ounces), preferably San Marzano
  • 3 tablespoons butter, melted
  • 7-8 leaves basil, torn
  • Salt and freshly ground black pepper
  • 2 tablespoons extra virgin olive oil (EVOO)
  • 3 cloves garlic, finely chopped or grated
  • 1 box chopped frozen spinach (10 ounces), defrosted or 3/4 pound fresh baby spinach, chopped
  • A few grates of fresh nutmeg
  • 1 box frozen baby or regular artichoke hearts (10 ounces), defrosted and chopped
  • 2 cups ricotta cheese
  • 1/2 cup grated Parmigiano Reggiano cheese
  • Zest of 1 lemon
  • 1 tablespoon thyme leaves, chopped
  • 1 egg yolk, lightly beaten
  • 1/4 cup flat-leaf parsley, chopped

Directions

1. Pre-heat the oven to 375ºF.
2. Place a large pot of water over high heat to boil the pasta. When the water reaches a bubble, salt it well, drop in the shells and cook them to al dente, according to the package directions. Drain the cooked shells and shock them under cold water to stop them from cooking. Reserve.
3. While the shells are cooking, mash up the tomatoes in the bottom of a casserole dish. Stir the butter, basil and some salt and pepper, to taste, into the dish and set aside.
4. Place a large skillet over medium-high heat with two turns of the pan of EVOO, about 2 tablespoons. Add the garlic to the pan and cook until it's aromatic and light golden brown, about 1 minute. Add the spinach and nutmeg to the pan and cook to heat through.
5. Transfer the spinach to a large bowl and stir in the artichokes, ricotta, Parmigiano Reggiano, lemon zest, thyme, egg yolk, parsley and some salt and pepper. Fill the reserved pasta shells with the mixture, arranging them on top of the sauce in the casserole dish as you complete them.
6. Cover the casserole with foil and transfer it to the oven. Bake, covered, for 20 minutes, then remove the foil and turn the oven up to 425˚F. Continue cooking until the filling is golden brown and bubbly, about 15 minutes more.

This came out super yummy!  I love the combination of spinach and artichokes, especially when cheese is involved. 
This recipe took a little longer than I thought it would. Give yourself enough time to prep or you can run around the kitchen like I do, whichever :)
I used canned artichokes, they work the same. I didn't have time to thaw spinach and artichokes, so I used frozen spinach and canned artichokes. I didn't use nutmeg. I'm not sure why I never use it, I just don't. I also bought the smaller ricotta cheese- it was 1 and 3/4 not two cups. I figured it was better not to have wasted cheese and I didn't notice the 1/4 cup was missing.
3 more Sunday's until California!! 

Sunday, June 17, 2012

Garden Burger- Food Network Magazine

Make four patties out of whatever ground meat you enjoy: we used turkey as it is Father's Day and my dad doesn't eat read meat :)

Toppings: Avocado, tomato, baby romaine lettuce, alfalfa sprouts & Green Goddess Dressing

Green Goddess Dressing: In a blender puree 1/3 a cup of plain low-fat yogurt, 1/2 cup of chopped chives, 2 tablespoons each of mayonnaise and chopped basil, 1 tablespoon of lemon juice (I used half a small lemon), 1 teaspoon of Worcestershire sauce, and salt and pepper to taste.

I served with sweet potato fries.

I realize as I look at the date of my last entry what a huge slacker I've been. I didn't realize how busy I have been. I plan to keep up with this until I move to San Diego, my last NH entry will be July 8th. I have a bridal shower the 15th and then I fly out the 18th!! I'm very excited. 

Happy Father's Day!!!!

Sunday, April 8, 2012

Chicken with Artichoke and Angel Hair - Everyday Food

Ingredients

  • Coarse salt and ground pepper
  • 1/4 cup all-purpose flour
  • 8 thin chicken cutlets (about 1 1/2 pounds total)
  • 2 tablespoons olive oil
  • 1 cup reduced-sodium chicken broth
  • 1 can (14 ounces) artichoke hearts packed in water, rinsed, drained, and quartered
  • 2 tablespoons rinsed and drained capers
  • 2 tablespoons butter
  • 8 ounces angel-hair pasta
  • 1/2 cup parsley leaves

Directions

  1. Set a large pot of salted water to boil. Place flour in a shallow dish, and season with salt and pepper. Dredge cutlets, shaking off excess. In a large skillet, heat 1 tablespoon oil over medium-high. Cook chicken in batches, adding remaining oil as needed, until light golden, 1 to 3 minutes per side; transfer to a dish.
  2. Add broth to skillet, and bring to a boil; cook until reduced by half. Add artichokes, capers, and the chicken with any juices. Gently swirl to combine, and bring just to a boil. Remove skillet from heat. Swirl in butter, and cover to keep warm.
  3. Add pasta to boiling water. Cook until al dente; drain. Serve chicken and sauce over pasta, topped with parsley.
I became distracted in doing multiple things at once today and picked this recipe last minute. I didn't give it much thought because I love artichokes. I realized after eating it that there are definitely somethings I would add to the sauce. I would probably reduce the broth and replace some of the liquid with white wine. I would also add the juice of half a lemon. Capers do taste good with lemons and while the sauce was good, it was lacking something.

I hope everyone enjoyed their holiday weekend!

Sunday, April 1, 2012

Haddock and Quinoa - Everyday Food

Ingredients

  • 1 cup quinoa
  • Coarse salt and ground pepper
  • 2 1/2 teaspoons extra-virgin olive oil
  • 1 pound boneless, skinless tilapia fillets, divided into 8 pieces
  • 3/4 teaspoon paprika
  • 1 cup English cucumber (6 ounces), diced small
  • 1/3 cup roughly chopped fresh dill
  • 1/3 cup feta (1 1/2 ounces), crumbled
  • 2 teaspoons fresh lemon juice (half lemon)

Directions

  1. In a small saucepan, bring quinoa, 2 cups water, and 1 teaspoon salt to a boil over high. Reduce to a medium simmer and cook until water evaporates, about 15 minutes. Transfer quinoa to a medium bowl and let cool 5 minutes.
  2. In a large nonstick skillet, heat 1 1/2 teaspoons oil over medium-high. Pat fish dry and season with salt and pepper; sprinkle with paprika. Cook fillets until opaque throughout, about 4 minutes, flipping halfway through. Stir cucumber, dill, feta, 1 teaspoon oil, and lemon juice into quinoa. Season with salt and pepper. Divide quinoa among four plates and top with fish.
So to start my blog, I have a story to share. All of my clothes are fitting me tight, like really tight. I had to change my shirt three times on Wednesday so my stomach didn't show its true size. I've come to the realization I need to be more active and eat a little better. I think for the most part my dinners have been pretty healthy and I try to balance them. I just don't eat well during the week and I've made an April resolution to be healthier :) I usually don't like "health" food so tonight I branched out and thought outside for what I normally eat. This meal turned out really good.
A few item changes; Shaws didn't have fresh tilapia so I used haddock. I didn't have time to thaw anything out, but frozen fish is fine to buy. Tilapia, haddock, and cod are really similar tasting. I will say that tilapia holds up a little better in the skillet and the haddock was a little hard to cook as it kept breaking.  Whatever fish you like best I would use, except maybe salmon. I also didn't add any oil to the quinoa, I forgot actually but it tasted really fresh and I think the oil might have taken away from that.
Admittedly I was hesitant to use quinoa. My mom had made it once for breakfast and we all responded with, well thanks for making us breakfast, at least we know we won't make this again. I keep reading about how healthy it is and I figured I would try it again. I followed the recipe for making the quinoa exactly as it says above. The only think I wasn't sure about is how much 2 teaspoons of fresh lemon juice is in ratio of how much lemon to cut; I used half a lemon and that seemed to be perfect.
Everyone really liked dinner tonight so the quinoa was a success! I might try to make it for breakfast again, sweeten it up. If I do, I'll keep you all posted!