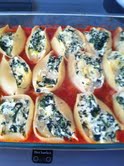
Wednesday, November 14, 2012

Stuffed Meatball Sub - Rachael Ray

Ingredients

  • 2 pounds bulk Italian hot sausage
  • 1/2 pound smoked mozzarella cheese, cut into 12 cubes
  • 1 tablespoon extra virgin olive oil (EVOO), plus more for drizzling
  • 1 onion, finely chopped
  • 2 cloves garlic, chopped
  • 1/4 cup softened sundried tomatoes, chopped
  • 1/4 cup pitted kalamata olives, chopped
  • One can Italian crushed tomatoes (28 ounces)
  • Salt and pepper
  • Four crusty sub rolls, ciabatta bread or individual ciabatta rolls, 7-8 inches long per person
  • A handful of basil leaves, torn or shredded
  • Freshly grated Pecorino Romano cheese, for topping

Directions

1. Pre-heat the oven to 425°F.

2. Place a bowl of warm water on a work surface. Arrange a cooling rack on a rimmed baking sheet. Divide the sausage into four equal portions. Form three balls from each portion, nestling one mozzarella cube into the center of each meatball and sealing the meat around it. Coat the meatballs with a drizzle of EVOO, place on the rack on the baking sheet and roast until firm, about 18 minutes.

3. While the meatballs are cooking, heat 1 tablespoon EVOO, one turn of the pan, in a saucepot over medium heat. Add the onion and garlic and cook until tender, about 5-6 minutes. Stir in the crushed tomatoes, sundried tomatoes and olives. Season with salt and pepper and simmer until the sauce thickens, about 7 minutes.

4. Remove the meatballs from the oven, turn off the heat, then place the rolls in the oven and bake until crisp, a minute or so. Split the rolls and top each with three meatballs and some sauce, basil and Pecorino Romano.

This dinner ended up being very filling - I couldn't finish my sandwich!! They also tasted great. I made a few changes.
I bought the small mozzerella balls instead of cutting the large block up. The meatballs came out pretty big, next time I would cut them in half.
I didn't use olives. I don't really care for the saltiness and the texture. I didn't' miss them :) Definitely add them if you like them though!
I also used Parm. cheese instead of the Romano. The grocery store near us doesn't always have specialty items and if they do they run out quickly. I do like Romano cheese and I think it would've tasted great, use it if you can.
Enjoy :)

Thursday, November 8, 2012

Shepard's Pie Stuffed Potatoes - Rachael Ray

Ingredients

  • 4 large Russet potatoes, scrubbed clean
  • 3 tablespoons extra virgin olive oil
  • 1/2 red bell pepper, seeded and chopped
  • 1 medium onion, chopped, divided
  • Freshly ground black pepper
  • 1/2 cup sour cream
  • 1 tablespoon smoked paprika
  • 1 pound ground sirloin or ground turkey
  • 1/2 pound button or crimini mushrooms, quartered
  • 2 cloves garlic, finely chopped or grated
  • 2 tablespoons butter
  • 2 tablespoons flour
  • 1 1/2 cups beef stock
  • 2 tablespoons spicy brown or Dijon mustard
  • 2 tablespoons soy sauce
  • 2 tablespoons Worcestershire sauce
  • 1/2 cup shredded smoked Gouda cheese, for sprinkling on top

Directions

Pre-heat the oven to 400ºF.
On a baking sheet, toss the potatoes with a hearty drizzle of EVOO and some salt. Bake in the oven until tender, about 1 hour. Let cool.
Turn the off oven and pre-heat the broiler.
While the potatoes are cooling, place a medium skillet over medium-high heat with one turn of the pan of EVOO, about 1 tablespoon. Add the bell pepper and half of the onion to the pan, season with salt and pepper, then cook until the veggies are tender, 5-6 minutes. Transfer them to a large mixing bowl.
When the potatoes are cool enough to handle, cut a thin slice lengthwise off of the top to expose the inside. Scoop out the potato flesh, taking care not to pierce the wall of the potato, and transfer to the bowl with the veggies (reserve the potato shells). Add the sour cream and paprika to the bowl and mash. Reserve warm.
Place a large skillet over medium-high heat with two turns of the pan of EVOO, about 2 tablespoons. Add the ground sirloin or ground turkey to the pan and cook until golden brown, 5-6 minutes. Add the mushrooms and cook until they start to turn golden brown, 4-5 minutes.
Add the remaining onion and garlic to the pan and cook until all the veggies are tender, about 5 minutes more. Push all of the ingredients to the edge of the pan and add the butter to the skillet. Sprinkle the flour over the melted butter and cook for about 1 minute. Add the stock, mustard, soy sauce, Worcestershire sauce and some salt and pepper to the skillet and stir to combine. Bring up to a bubble and simmer until thickened, 2-3 minutes.
Fill the potato shells with the beef and mushroom mixture, then top each of them with the reserved mashed potatoes. Transfer to a baking sheet and sprinkle with the cheese. Pop the potatoes under the broiler until the cheese is melted and tops are golden brown.

These potatoes were super filling! I followed the recipe as is. They came out delicious :) The only think I was disappointed in was the amount of left over potato. I didn't plan for so much to be left over and it went to waste. Plan for the left overs and serve with your favorite main dish.

Tuesday, October 30, 2012

Catalina Chicken - My Mom

Ingredients

Chicken Breast
Catalina Dressing (whole bottle)
Dry Onion Soup (one package)
Canned Jelled Cranberries
Salt and peper

Directions

Preheat the oven to 350. Place the chicken in a baking dish, season with salt and pepper. In a bowl, mix together the dressing, soup mix, and jelled cranberries. Pour over the chicken. Bake in the oven for about 30 minutes. Serve with white rice and a bread to soak up the sauce like a crescent.

This is literally the first thing my mom ever taught me to make.  I was pretty young, but it is so simple and inexpensive. I have passed this recipe along to friends who always seem to enjoy it. Brad and Nick also seemed to really like it, the chicken comes out really juicy and who can say no to crescent rolls! I also usually serve this with a veggie but I got a little lazy :) Enjoy this super easy dish!!


Thursday, October 18, 2012

Chicken Pot Pie - Everyday Food

 Ingredients

  • 3 tablespoons unsalted butter
  • 1 small yellow onion, minced
  • 1 stalk celery, thinly sliced
  • 2 carrots, diced medium
  • 5 tablespoons all-purpose flour
  • 2 cups chicken broth
  • 1/3 pound green beans, trimmed and cut into 1-inch pieces
  • 2 cups diced cooked chicken
  • Salt and pepper
  • 1 sheet thawed puff pastry
  • 1 beaten egg

Directions

  1. In a large saucepan, melt butter over medium-high. Add onion, celery, and carrots and cook until onion is translucent, about 4 minutes. Add flour and cook, stirring, 1 minute. Gradually add broth, stirring constantly, then bring to a boil. Reduce heat and simmer 5 minutes. Stir in green beans and chicken and season with salt and pepper.
  2. Divide filling among four 8-ounce ramekins. Roll out 1 sheet puff pastry and cut 4 rounds to fit ramekins. Cut a small X in center of each to vent, then place on top of filling. Brush with beaten egg. Bake at 375 degrees until filling is bubbling and crust is golden, 30 to 40 minutes.
I made this last night because I really wanted to feel full after dinner so as to not eat snacks later. It worked :) Brad was also super excited, comfort food at 275 calories a bowl is always a plus.
I pretty much followed the recipe all the way through. I would make this again with the following changes:
First, I didn't need a whole onion. It was really strong and almost overwhelming. I would use half a small onion next time. I think onions are important for flavor but not when the over take the dish.
Secondly, since I plan to cut the onions in half I would add more celery, carrots and green beans. I bought a frozen package of green beans (12oz), next time I'll use the whole thing. I'd an extra celery stalk and carrot.
I also have no idea how much weight 2 cups of chicken is. I bought a pound and used 2 of the 3 pieces. I might go ahead and use all 3 next time - if you feel there is too much you could always add it to a lunch size salad the next day. I also didn't roll the pastry sheet out, I had plenty. It didn't take any longer to cook - it took about 20 minutes and then they started boiling over (which reminds me there's an oven to clean). Next time I'll cook them on a pan to catch the overflow.

Happy Comfort Food Season :)

Thursday, October 4, 2012

Steakhouse Chili Pot - Rachael Ray

Ingredients

  • 1 tablespoon extra virgin olive oil (EVOO)
  • 4 slices lean, smoky bacon, finely chopped
  • 2 pounds ground sirloin, ask your butcher for coarse ground beef
  • 1 large onion, finely chopped
  • 3-4 cloves garlic, finely chopped
  • 4 tablespoons chili powder, such as Gerhardt's brand
  • Salt and pepper
  • 1/3 cup Worcestershire sauce
  • 1/4 cup dark brown sugar
  • 2 tablespoons hot sauce
  • One can tomato sauce (14 ounces)
  • 2 cups beef stock
  • Sour cream, for topping
  • 1/2 cup flat leaf parsley, finely chopped, for topping

Preparation

In a large chili pot or Dutch oven, heat the EVOO, one turn of the pan, over medium-high to high heat. Add the bacon and cook until the fat renders, about 2 minutes. Add the beef and cook, stirring, until browned, 8-10 minutes. Add the onion and cook until softened, about 5 minutes. Add the garlic and chili powder, a little salt and lots of pepper.
In a bowl, stir together the Worcestershire sauce, brown sugar, hot sauce and tomato sauce. Stir into the chili. Stir in the beef stock and bring to boil, then lower the heat and cook until thickened, 6-7 minutes.
Serve shallow bowls of chili with lots of sour cream and parsley on top.

I keep wishing it was fall here in San Diego. After being home for my friend's wedding (Congratulations Lili and Dan!!), I missed the brisk and rainy weather. While I'm glad it didn't rain for the wedding, I did miss the 50 degree weather. I've decided the only way to make it feel like fall is turn on the AC and make cozy food.
This chili came out better than I expected. I say that because I've never had chili that didn't have beans in and I really like beans, so I was a little skeptical. I did fail to get enough ground sirloin- the market I went to didn't sell it. I had the butcher ground some for me; I grabbed two pounds but it only ended up being one pound ground up. I decided at that point to just buy 80/20 ground beef. I also didn't have lean smoky bacon, I cut off some of the fat and it was fine. I should have put it in the freezer for 5-10 minutes because it was a little hard to cut. I kept everything else the same.
I served this with a salad on the side. Balancing is always good! I also think keeping some more traditional toppings are good - we only had cheddar cheese and sour cream but chips, corn bread, jalapenos, etc. would've been good too.


Tuesday, September 18, 2012

Easy Tomato Soup with Grilled Cheese Croutons - Food Network Magazine

(sorry the picture is messy - this is a picture of seconds, it was so good!)

Ingredients

  • 3 tablespoons good olive oil
  • 3 cups yellow onions, chopped (2 onions)
  • 1 tablespoon minced garlic (3 cloves)
  • 4 cups chicken stock, preferably homemade
  • 1 (28-ounce) can crushed tomatoes, preferably San Marzano
  • Large pinch of saffron threads
  • Kosher salt and freshly ground black pepper
  • 1/2 cup orzo
  • 1/2 cup heavy cream
  • Grilled Cheese Croutons (see below)

Directions

In a large pot or Dutch oven (such as Le Creuset), heat the olive oil over medium heat. Add the onions and cook over medium-low heat for 15 minutes, stirring occasionally, until golden brown. Add the garlic and cook for 1 more minute. Stir in the chicken stock, tomatoes, saffron, 1 tablespoon salt and 1 teaspoon pepper. Bring the soup to a boil, then lower the heat and simmer for 15 minutes.
Meanwhile, fill a medium pot with water, add 2 teaspoons salt and bring to a boil. Add the orzo and cook for 7 minutes. (It will finish cooking in the soup.) Drain the orzo and add it to the soup. Stir in the cream, return the soup to a simmer and cook for 10 more minutes, stirring frequently.
Serve hot with Grilled Cheese Croutons scattered on top.

Grilled Cheese Croutons
4 (1/2-inch-thick) slices country white bread
2 tablespoons unsalted butter, melted
4 ounces Gruyere cheese, grated
Heat a panini grill. Place the four slices of bread on a cutting board and brush lightly with the melted butter, being sure to butter the corners. Turn the slices over and pile Gruyere on two of the slices. Place the remaining two slices of bread on top of the Gruyere, buttered sides up.
Grill the sandwiches on the panini grill for about 5 minutes, until nicely browned. Place on a cutting board, allow to rest for 1 minute and cut into 1-inch cubes.

Please don't be put off by the  expensive sounding ingredients/cookware. I bought the Food Network Magazine because there were pumpkins on the cover and I realized I'm going to miss fall. I found this recipe and definitely made some changes. It did, however, make me miss my mom :) be warned.

I bought low-sodium chicken stock, which worked fine. I'm not big on using a lot of salt or pepper - I add them of course but I think people should add it as needed when they are served. (My sister hates pepper so I did get used to only adding a little). Also, I did not use saffron or the orzo. Saffron is expensive, it will run you probably $15+ for a small amount. Since I'm not working full time, $15 is an insane amount to spend on a spice for one time use. I decided not to use the orzo - I really wanted the croutons to stand out and be the only texture in the soup. I did splurge on the Gruyere cheese, it was so good in the soup. Definitely make the grilled cheese croutons (I should've cooked mine a little longer!). They melt into the soup and are worth it.

This is a soup I plan on making again. While San Diego doesn't get "cold" we will have some chilly nights and I'm looking forward to enjoying this soup again.

Thursday, September 13, 2012

Tortilla and Black Bean Pie - Everyday Food

Ingredients

  • 4 flour tortillas (10 inches)
  • 2 tablespoons canola oil
  • 1 large onion, diced
  • 1 jalapeno chile, minced (remove seeds and ribs for less heat)
  • 2 garlic cloves, minced
  • 1/2 teaspoon ground cumin
  • Coarse salt and freshly ground pepper
  • 2 cans (15 ounces each) black beans, drained and rinsed
  • 12 ounces beer, or 1 1/2 cups water
  • 1 package (10 ounces) frozen corn
  • 4 scallions, thinly sliced, plus more for garnish
  • 8 ounces cheddar cheese, shredded (2 1/2 cups)

Directions

  1. Preheat oven to 400 degrees. With a paring knife, trim tortillas to fit a 9-inch springform pan. Use the bottom of the pan as a guide. Set aside.
  2. Heat oil in a large skillet over medium heat. Add onion, jalapeno, garlic, and cumin; season with salt and pepper. Cook, stirring occasionally, until softened, 5 to 7 minutes.
  3. Add beans and beer, and bring to a boil. Reduce heat to medium; simmer until liquid has almost evaporated, 8 to 10 minutes. Stir in corn and scallions, and remove from heat. Taste and adjust for seasoning.
  4. Fit a trimmed tortilla in bottom of springform pan; layer with 1/4 of the beans and 1/2 cup of cheese. Repeat three times, using 1 cup cheese on top layer. Bake until cheese melts, 20 to 25 minutes. Remove side of pan; sprinkle pie with scallions. To serve, slice into wedges.
As you can see from the picture, I slightly over cooked it (by slightly I mean way overcooked it). I should've watched it more closely. I also wasn't using a springform pan, I don't own one. I think having that pan would've been helpful in cutting the pie and serving it.
I also used a more "hoppy" beer. I think I used an IPA. I've made this before and next time I'll use a more neutral flavored beer. Other than that, I followed this recipe as is. This wasn't my roommates favorite dishes so far but they did eat all of it. Its a great vegetarian dish and those meat eater men I live with seemed to miss the protein :)
REALLY IMPORTANT - Do not touch the seeds or ribs of that jalapeno with your hands. I did it once before and it burns like you would not believe. If you happen to tempt fate, keeping your hands in milk will help. I know - I happened to do this when I first started cooking.

Hands in Milk - circa 2005

Wednesday, September 5, 2012

Chili-Rubbed Pork with Corn Salsa - Williams-Sonoma

Ingredients:

  • 2 pork tenderloins, about 1 1/2 lb. total
  • 2 Tbs. olive oil
  • Salt and freshly ground pepper, to taste
  • 2 tsp. ancho chili powder
  • 1 cup fresh or thawed frozen corn kernels
  • 3/4 tsp. ground cumin
  • 1 small yellow onion, chopped
  • 1 large tomato, seeded and chopped
  • Juice of 1 lime
  • 3 Tbs. chopped fresh cilantro 

Directions:

Preheat an oven to 425°F.
Rub the pork tenderloins with 1 Tbs. of the olive oil. Season generously with salt and pepper, and sprinkle with the chili powder.
In a large fry pan over medium-high heat, warm the remaining 1 Tbs. olive oil. Add the pork and brown on all sides, about 5 minutes total. Transfer the tenderloins to a shallow roasting pan just large enough to hold them. Reserve the fry pan and drippings.
Transfer the pork to the oven and roast until an instant-read thermometer inserted into the center registers 145° to 150°F and the meat is barely pink in the center, 15 to 20 minutes. Transfer the pork to a carving board, cover loosely with aluminum foil and let rest for 10 minutes.
Meanwhile, add the corn and cumin to the drippings in the fry pan and set the pan over medium-high heat. Cook, stirring, until the corn is lightly browned, 3 to 4 minutes. Remove from the heat and stir in the onion, tomato, lime juice and cilantro. Season with salt and pepper.
Cut the pork into thin slices and serve with the warm salsa. 

I served this with pre-made crescent rolls and sweet potato fries. For the sweet potatoes: I peeled them, cut them into fry size, put them on a rimmed sheet, sprinkled them with olive oil, pepper, and salt. I cooked them at 425 for about 25 minutes with the pork.

I was really excited to make this, because I've never cooked with pork loin before. My mom and Aunt have, it always turned out well so I was ready to take on the challenge! I went out and bought an inexpensive meat thermometer, I wanted to make sure the pork was cooked enough. I kept checking it and, of course, the thermometer didn't work. Knowing that our oven range is not quite as hot as it should be, I cooked it longer. It was slightly annoying and I will be sure to buy a mid-priced item next time, but the pork and corn salsa came out delicious! Brad had seconds which is always a good sign :)

Tuesday, August 28, 2012

An Update

As many of you know, I up and left New Hampshire for the sunnier side of life in San Diego. While today itself is not turning out to be a literal sunny day, I am enjoying it out here. I am still looking for a full time job, but in the meantime I have been cooking for my boyfriend, Brad, and our roommate, Nick.
Many of you know I drove my car across country and my main concern for packing my car (clothes aside) was making sure I could fit all of my kitchen equipment in the car. I knew that Brad didn't cook moving out here and we had several phone conversations which went like this: me - do you have (enter anything you could think of)? Brad - nope.  While I drove everyone crazy with my neurotic packing of kitchen supplies, I am glad I brought it. Not working and being new to an area is a little more difficult than I anticipated. The good news is that I am enjoying making food for Brad and Nick. Sometimes they look at what I've made and ask questions of, "now what is this?"but they seem to enjoy everything and are happy to not have to worry about dinner. Plus I've saved them tons of money in not eating out every night.
I have made some new dishes which I will definitely be posting soon. For the most part I've made food I've already posted to the blog - Pesto Presto Chicken, Mexican Stuffed Shells, Spinach and Artichoke Mac & Cheese, Beef and Broccoli Stir Fry, and Gazpacho Pasta. Brad's two favorites are Mexican Stuffed Shells and Pesto Presto Chicken. Mexican Stuffed Shells are inexpensive and easy to make, I've made them a few times. So far its been full, happy stomachs and I don't have to do dishes afterwards, which is pretty awesome.
I will definitely be updated my blog with some new things I've made. Please comment about anything you've tried from the blog, add what you thought and what you might've changed. Keep cooking :)

Sunday, July 1, 2012

Spice-roasted Cauliflower with Artichokes + Salmon - Food Network

Spice-Roasted Cauliflower with Artichokes

Ingredients

  • 1 head cauliflower, cut into bite-size florets
  • 1 pound Jerusalem artichokes, cut into 1-inch dice
  • Extra-virgin olive oil
  • Kosher salt
  • 1 tablespoon cumin seeds, toasted and ground
  • 1/2 teaspoon cayenne pepper
  • Finely chopped fresh chives, for sprinkling

Directions

Preheat the oven to 375 degrees F.

In a large bowl, combine the cauliflower and Jerusalem artichokes; toss them generously with olive oil and salt.

In a small bowl, combine the cumin and cayenne and add to the vegetables. Toss well to thoroughly combine.

Spread the veggies on a baking sheet in one even layer-use two baking sheets, if necessary. Roast 20 minutes, then stir the veggies so they have the chance to brown all over and rotate the pan to ensure even cooking. Roast another 20 minutes, then stir and rotate again.

Roast the vegetables for an additional 5 to 10 minutes, or until they are brown, tender and smell wonderful-almost like popcorn. If they aren't lovely and brown, let them continue to roast for another few minutes. Taste and adjust the seasoning, if necessary.

Remove the veggies from the oven, sprinkle with chives and transfer to a serving dish. Serve immediately.

Salmon - I seasoned the Salmon with Old Bay Seasoning. I cooked in a pan with extra-virgin olive oil for about 8-10 minutes. About half way through cooking I added fresh lemon juice from half a lemon.

I saw the cauliflower recipe in Food Network Magazine and knew immediately that I was going to make it for today. I did make some changes.
First being that I used regular artichokes because I figured they were the same thing. After researching Jerusalem artichokes on Wikipedia, they are not the same thing (they also aren't from Jerusalem). In fact, they aren't really even close to being the same thing. So I'm not really sure how much this impacted the recipe other than I really really really like regular artichokes and I thought they tasted great.
Second, I hate toasting something and then grinding it up when it already comes in spice form. I used cumin spice, 2 teaspoons. It was plenty spicy and if you are worried about the flavor being too much, you could definitely get away with using less.

One more Sunday dinner in NH...


Sunday, June 24, 2012

Spinach and Artichoke Stuffed Shells- Rachael Ray

Ingredients

  • 20 large pasta shells
  • 1 can whole plum tomatoes (28 ounces), preferably San Marzano
  • 3 tablespoons butter, melted
  • 7-8 leaves basil, torn
  • Salt and freshly ground black pepper
  • 2 tablespoons extra virgin olive oil (EVOO)
  • 3 cloves garlic, finely chopped or grated
  • 1 box chopped frozen spinach (10 ounces), defrosted or 3/4 pound fresh baby spinach, chopped
  • A few grates of fresh nutmeg
  • 1 box frozen baby or regular artichoke hearts (10 ounces), defrosted and chopped
  • 2 cups ricotta cheese
  • 1/2 cup grated Parmigiano Reggiano cheese
  • Zest of 1 lemon
  • 1 tablespoon thyme leaves, chopped
  • 1 egg yolk, lightly beaten
  • 1/4 cup flat-leaf parsley, chopped

Directions

1. Pre-heat the oven to 375ºF.
2. Place a large pot of water over high heat to boil the pasta. When the water reaches a bubble, salt it well, drop in the shells and cook them to al dente, according to the package directions. Drain the cooked shells and shock them under cold water to stop them from cooking. Reserve.
3. While the shells are cooking, mash up the tomatoes in the bottom of a casserole dish. Stir the butter, basil and some salt and pepper, to taste, into the dish and set aside.
4. Place a large skillet over medium-high heat with two turns of the pan of EVOO, about 2 tablespoons. Add the garlic to the pan and cook until it's aromatic and light golden brown, about 1 minute. Add the spinach and nutmeg to the pan and cook to heat through.
5. Transfer the spinach to a large bowl and stir in the artichokes, ricotta, Parmigiano Reggiano, lemon zest, thyme, egg yolk, parsley and some salt and pepper. Fill the reserved pasta shells with the mixture, arranging them on top of the sauce in the casserole dish as you complete them.
6. Cover the casserole with foil and transfer it to the oven. Bake, covered, for 20 minutes, then remove the foil and turn the oven up to 425˚F. Continue cooking until the filling is golden brown and bubbly, about 15 minutes more.

This came out super yummy!  I love the combination of spinach and artichokes, especially when cheese is involved. 
This recipe took a little longer than I thought it would. Give yourself enough time to prep or you can run around the kitchen like I do, whichever :)
I used canned artichokes, they work the same. I didn't have time to thaw spinach and artichokes, so I used frozen spinach and canned artichokes. I didn't use nutmeg. I'm not sure why I never use it, I just don't. I also bought the smaller ricotta cheese- it was 1 and 3/4 not two cups. I figured it was better not to have wasted cheese and I didn't notice the 1/4 cup was missing.
3 more Sunday's until California!! 

Sunday, June 17, 2012

Garden Burger- Food Network Magazine

Make four patties out of whatever ground meat you enjoy: we used turkey as it is Father's Day and my dad doesn't eat read meat :)

Toppings: Avocado, tomato, baby romaine lettuce, alfalfa sprouts & Green Goddess Dressing

Green Goddess Dressing: In a blender puree 1/3 a cup of plain low-fat yogurt, 1/2 cup of chopped chives, 2 tablespoons each of mayonnaise and chopped basil, 1 tablespoon of lemon juice (I used half a small lemon), 1 teaspoon of Worcestershire sauce, and salt and pepper to taste.

I served with sweet potato fries.

I realize as I look at the date of my last entry what a huge slacker I've been. I didn't realize how busy I have been. I plan to keep up with this until I move to San Diego, my last NH entry will be July 8th. I have a bridal shower the 15th and then I fly out the 18th!! I'm very excited. 

Happy Father's Day!!!!

Sunday, April 8, 2012

Chicken with Artichoke and Angel Hair - Everyday Food

Ingredients

  • Coarse salt and ground pepper
  • 1/4 cup all-purpose flour
  • 8 thin chicken cutlets (about 1 1/2 pounds total)
  • 2 tablespoons olive oil
  • 1 cup reduced-sodium chicken broth
  • 1 can (14 ounces) artichoke hearts packed in water, rinsed, drained, and quartered
  • 2 tablespoons rinsed and drained capers
  • 2 tablespoons butter
  • 8 ounces angel-hair pasta
  • 1/2 cup parsley leaves

Directions

  1. Set a large pot of salted water to boil. Place flour in a shallow dish, and season with salt and pepper. Dredge cutlets, shaking off excess. In a large skillet, heat 1 tablespoon oil over medium-high. Cook chicken in batches, adding remaining oil as needed, until light golden, 1 to 3 minutes per side; transfer to a dish.
  2. Add broth to skillet, and bring to a boil; cook until reduced by half. Add artichokes, capers, and the chicken with any juices. Gently swirl to combine, and bring just to a boil. Remove skillet from heat. Swirl in butter, and cover to keep warm.
  3. Add pasta to boiling water. Cook until al dente; drain. Serve chicken and sauce over pasta, topped with parsley.
I became distracted in doing multiple things at once today and picked this recipe last minute. I didn't give it much thought because I love artichokes. I realized after eating it that there are definitely somethings I would add to the sauce. I would probably reduce the broth and replace some of the liquid with white wine. I would also add the juice of half a lemon. Capers do taste good with lemons and while the sauce was good, it was lacking something.

I hope everyone enjoyed their holiday weekend!

Sunday, April 1, 2012

Haddock and Quinoa - Everyday Food

Ingredients

  • 1 cup quinoa
  • Coarse salt and ground pepper
  • 2 1/2 teaspoons extra-virgin olive oil
  • 1 pound boneless, skinless tilapia fillets, divided into 8 pieces
  • 3/4 teaspoon paprika
  • 1 cup English cucumber (6 ounces), diced small
  • 1/3 cup roughly chopped fresh dill
  • 1/3 cup feta (1 1/2 ounces), crumbled
  • 2 teaspoons fresh lemon juice (half lemon)

Directions

  1. In a small saucepan, bring quinoa, 2 cups water, and 1 teaspoon salt to a boil over high. Reduce to a medium simmer and cook until water evaporates, about 15 minutes. Transfer quinoa to a medium bowl and let cool 5 minutes.
  2. In a large nonstick skillet, heat 1 1/2 teaspoons oil over medium-high. Pat fish dry and season with salt and pepper; sprinkle with paprika. Cook fillets until opaque throughout, about 4 minutes, flipping halfway through. Stir cucumber, dill, feta, 1 teaspoon oil, and lemon juice into quinoa. Season with salt and pepper. Divide quinoa among four plates and top with fish.
So to start my blog, I have a story to share. All of my clothes are fitting me tight, like really tight. I had to change my shirt three times on Wednesday so my stomach didn't show its true size. I've come to the realization I need to be more active and eat a little better. I think for the most part my dinners have been pretty healthy and I try to balance them. I just don't eat well during the week and I've made an April resolution to be healthier :) I usually don't like "health" food so tonight I branched out and thought outside for what I normally eat. This meal turned out really good.
A few item changes; Shaws didn't have fresh tilapia so I used haddock. I didn't have time to thaw anything out, but frozen fish is fine to buy. Tilapia, haddock, and cod are really similar tasting. I will say that tilapia holds up a little better in the skillet and the haddock was a little hard to cook as it kept breaking.  Whatever fish you like best I would use, except maybe salmon. I also didn't add any oil to the quinoa, I forgot actually but it tasted really fresh and I think the oil might have taken away from that.
Admittedly I was hesitant to use quinoa. My mom had made it once for breakfast and we all responded with, well thanks for making us breakfast, at least we know we won't make this again. I keep reading about how healthy it is and I figured I would try it again. I followed the recipe for making the quinoa exactly as it says above. The only think I wasn't sure about is how much 2 teaspoons of fresh lemon juice is in ratio of how much lemon to cut; I used half a lemon and that seemed to be perfect.
Everyone really liked dinner tonight so the quinoa was a success! I might try to make it for breakfast again, sweeten it up. If I do, I'll keep you all posted!

Sunday, March 25, 2012

Pesto-presto chicken - Rachael Ray

Ingredients

  • 3 tablespoons pine nuts
  • 8-10 leaves basil, about a half a cup
  • 1/4 cup flat-leaf parsley leaves, a handful
  • 1 5.4 ounce round of Boursin garlic and herb soft cheese
  • 1/2 cup grated Parmigiano-Reggiano cheese, a couple of handfuls
  • 4 tablespoons EVOO - Extra Virgin Olive Oil
  • Salt and pepper
  • 4 boneless, skinless chicken breasts
  • 12 slices 1/2 inch thick of vine ripe tomato, 3 medium tomatoes 
Directions

Preheat oven to 450ºF. In a small pan over medium heat lightly toast the nuts then cool.
In the bowl of a food processor, combine the basil, parsley, pine nuts, Boursin cheese, 1/4 cup Parmigiano-Reggiano (about a handful), some salt and pepper. Process into a smooth paste. Reserve.
Butterfly each of the chicken breasts and pound them out lightly in a plastic bag with a dash of water using a skillet or meat mallet. Season both sides of the chicken and divide the herb-cheese mixture between the four breasts, placing a scoop on one half of each breast. Fold the flap over to enclose the cheese mixture.
Transfer the chicken pockets to a baking sheet and shingle 3 slices of tomato over each breast. Season with some salt and pepper, drizzle with about 2 tablespoons EVOO and sprinkle with the remaining Parmigiano Reggiano (about a handful). 
Bake the chicken pockets until cooked through and light golden brown, 20-25 minutes.

This turned out awesome. I made it following the recipe exactly. You can substitute the Parmigiano-Reggiano with regular Parm; the Parmigiano-Reggiano is very expensive and sometimes Shaw's doesn't carry it. I served this with a boxed rice pilaf (garlic flavored) and broccoli. So good :)

Sunday, March 4, 2012

Spaghetti Squash Gratin - Everday Food


For the Chicken- I lightly floured the chicken, seasoned with salt and pepper, and cooked in olive oil in a pan.
For the broccoli- I steamed the broccoli in the microwave then drained the water. I seasoned with salt and pepper with a little bit of butter.

Spaghetti Squash Gratin

Ingredients

  • 1 cup low-sodium chicken broth
  • 1 cup whole milk
  • 2 garlic cloves, smashed and peeled
  • 3 tablespoons all-purpose flour
  • 1 tablespoon unsalted butter
  • 1 to 2 anchovy fillets, chopped
  • 3 teaspoons chopped fresh sage leaves
  • Roasted Spaghetti Squash (see previous blog for roasting instructions)
  • Coarse salt and ground pepper
  • 3/4 cup fresh breadcrumbs
  • 2 tablespoons grated Parmesan

Directions

  1. Preheat oven to 375 degrees. In a small pot, bring broth, milk, and garlic to a boil over medium-high and cook 1 minute. Pour into a medium bowl, then slowly add flour, whisking constantly. In pot, melt butter over medium. Add anchovies and 2 teaspoons sage and cook, stirring, 1 minute. Return broth mixture to pan, bring to a simmer, and cook until thickened, 6 minutes. Discard garlic.
  2. Add squash to sauce and season with salt and pepper. Transfer to a 2-quart shallow baking dish. In a small bowl, combine 1 teaspoon sage, breadcrumbs, and Parmesan and sprinkle over squash. Bake until top is golden brown and mixture is bubbling at edges, 20 to 25 minutes. 
     This was fairly easy to make and is healthier than potatoes au gratin. I wish the sauce had been creamier, I would add cheese (probably fontina) to the sauce next time. I also didn't use anchovies, I haven't really cooked with them and it freaks me out that they "melt" when they are cooked. I used regular store bough plain breadcrumbs, they worked out just fine :)
School vacation is officially over as of tomorrow :( 20 schools days in March. The countdown for the end of school is on! I'm counting down as I have decided to move out west to California and start a new adventure. I'll definitely keep sharing recipes though :) Happy eating.

Sunday, February 19, 2012

Mexican Stuffed Shells - Blog

 Ingredients:
1 lb. ground beef
1 package low-sodium taco seasoning
4 oz. cream cheese
14-16 jumbo pasta shells
1.5 cup salsa
1 cup taco sauce
1 cup cheddar cheese
1 cup monterey jack cheese
3 green onions
Sour cream

Directions:
Preheat oven to 350°.
In a frying pan cook ground beef; add taco seasoning and prepare according to package directions.  Add cream cheese, cover and simmer until cheese is melted. Blend well. Set aside and cool completely.  While ground beef is cooking, cook the pasta shells according to directions; drain. Set shells out individually on cutting board/baking sheet so that they don’t stick together.
Pour salsa on bottom of 9×13 baking dish.  Stuff each shell with the meat mixture. Place shells in 9×13 pan open side up. Cover shells with taco sauce.  Cover with foil and bake for 30 minutes.
After 30 minutes, add shredded cheese and bake for 10-15 more minutes, with the foil removed.  Top with any condiments you’d like (green onions, black olives, etc.) Serve with sour cream and/or more salsa.

This was super easy to make and came out awesome.
I found that Sargento makes a shredded cheddar cheese and monterey jack cheese combo. So exciting and cheaper. I also didn't use 2 cups worth of cheese. I always use 1/3 reduced fat cream cheese, especially in dishes with other types of cheese. It's a healthier option. I also used ground turkey instead of beef; my dad doesn't eat red meat and turkey has less fat.
I used about 20 shells; I have no idea what 'jumbo' shells are but mine seems fairly normal :) 
I served mine with shredded lettuce, tomato, and a slice of avocado. The blog I took this from didn't add any veggies and I like to serve something fresh with dinner. It was a nice addition to dish.

Check out the blog I got this recipe from: http://thewaytohisheart.wordpress.com/2011/09/30/mexican-stuffed-shells/


Sunday, January 29, 2012

Quick Turkey Bolognese with Spaghetti Squash - Everyday Food


Prepare the Squash

Preheat oven to 375 degrees. With a small sharp knife, prick squash all over. Place on a rimmed baking sheet and roast until tender when pierced with knife, about 1 hour 20 minutes, flipping halfway through. When cool enough to handle, halve lengthwise and scoop out seeds. Scrape squash with a fork to remove flesh in long strands.

Ingredients

  • 3 bacon slices, cut into 1/2-inch pieces
  • 2 tablespoons extra-virgin olive oil
  • 1 medium yellow onion, diced small
  • 1 large carrot, diced small
  • 2 small celery stalks, diced small
  • 3 garlic cloves, minced
  • 1 pound ground turkey breast or chicken breast
  • 2 cups crushed tomatoes (from a 28-ounce can)
  • Red-pepper flakes (optional)
  • Coarse salt and ground pepper
  • 6 cups of roasted spaghetti squash
  • Grated Parmesan, for serving

Directions

  1. In a large nonstick skillet, cook bacon over medium until crisp, 8 minutes. With a slotted spoon, transfer bacon to paper towels to drain. Add 1 tablespoon oil to skillet. Add onion, carrot, celery, and garlic and cook until vegetables are tender, 15 minutes. Transfer to a medium bowl. Add 1 tablespoon oil and turkey to skillet and cook, breaking up meat with a wooden spoon, until almost cooked through, 5 minutes. Add bacon, vegetables, tomatoes, and pinch of red-pepper flakes, if using, to skillet and bring to a simmer; cook until turkey is cooked through and sauce is thickened, 5 minutes. Season with salt and pepper. Serve over spaghetti squash and sprinkle with Parmesan.

    The challenge this week was to use more of what we already had in the fridge - ground turkey and the left over sauce from last week. The rolls in the picture also needed to be used. I only bought the spaghetti squash, carrots, and celery. This dish was really easy to prepare and the squash is a great substitute for real spaghetti; the magazine said you save about 250 calories. 
    I did make some changes. Since I had red sauce left over from last week used that instead of buying the tomatoes again; I also didn't add onions because there was plenty in the sauce.  Other than that I followed the recipe. The sauce went perfectly with the squash, which soaked up the flavor. 
    I really love the Everyday Food magazine; you pick it up at the check out line. They have shopping lists organized and in season vegetables; everything I have made from there has been yummy!  The issue this is from is currently out - next week I'm hoping to make some of the super bowl food ideas.

    GO PATRIOTS!! :)  

Sunday, January 22, 2012

Red Sauce - Emeril Lagasse, Chicken Parm - Everyday Food

My hiatus is over :)

Basic Red Sauce - Emeril (foodnetwork.com)

Ingredients

  • 1 tablespoon olive oil
  • 3/4 cup chopped yellow onions (1 medium yellow onion)
  • 1/2 teaspoon minced garlic (2 cloves of garlic)
  • 1/4 teaspoon salt
  • 1/4 teaspoon dried basil
  • 1/4 teaspoon dried oregano
  • 1/8 teaspoon ground black pepper
  • 1 (28-ounce) can whole peeled tomatoes
  • 1 (15-ounce) can tomato sauce
  • 4 1/2 teaspoons tomato paste
  • 1 cup water
  • 1/2 teaspoon sugar

Directions

In a medium, heavy pot, heat the oil over medium heat. Add the onions, garlic, salt, basil, oregano and black pepper, and cook, stirring, until soft, 5 minutes.
Place the tomatoes in a large bowl and squeeze to break into small pieces. Add the tomato sauce, tomato paste, water, and sugar to the pot and stir well. Bring to a simmer over medium-high heat.
Lower the heat to medium-low, and simmer uncovered for 45 minutes, stirring occasionally with a heavy wooden spoon.


Chicken Parm- Everyday Food

Ingredients

  • 3 pounds boneless, skinless chicken breasts (3 whole breasts, split down the middle)
  • 1/2 cup plain breadcrumbs
  • 3/4 cup freshly grated Parmesan cheese
  • 1/4 teaspoon freshly ground black pepper
  • 1 1/2 pounds fresh mozzarella cheese, sliced thin

Directions

  1. Working on a large surface covered in baking parchment or plastic wrap, lay down the chicken breasts. Using a sharp slicing knife, cut each piece in half horizontally through the middle.
  2. In a large prep pan or dish, combine the bread crumbs and 1/2 cup of the Parmesan cheese. Spread out to cover the whole bottom of the pan. Lay down as many chicken breasts as will fit on the mixture. Sprinkle salt and pepper over each piece and turn over, completely coating with the bread-crumb mixture. Repeat the process with the remaining pieces of chicken.
  3. Heat a large skillet over medium-high heat. Swirl in 2 tablespoons of olive oil to coat the pan. Add the chicken breasts in one layer and cook until golden, about 3 minutes on each side. Remove and repeat the process for the remaining chicken, adding a little oil to the pan as needed.
  4. Preheat the oven to 400 degrees Fahrenheit. Spoon some tomato sauce into a greased 9 x 13-inch baking dish to cover. Layer in the chicken pieces and top with mozzarella slices. Spoon over about 1 1/4 cups more sauce, and sprinkle on the remaining 1/4 cup of Parmesan cheese. Bake until golden and bubbling, 30 to 35 minutes. Let rest for at least 15 minutes before serving.
I decided, for some reason, I needed to learn how to make red sauce. I think what I liked most about making it was that I knew exactly what was in it and it tasted really fresh. I substituted dry basil for fresh, I should have added more. I also would add more garlic; I also really love the taste of basil and garlic. This sauce is really simple, there aren't any crazy flavors but I would definitely recommend it.

I haven't made chicken parm in forever. I figured if I was making sauce, I should make a whole dish! The breading in this recipe is really light; I don't like my chicken heavily breaded and this breading is just enough to cover and flavor the chicken. If you prefer a heavier breading, use the flouring technique of: chicken in flour, dip in egg, and then place in bread crumbs. I served it with spaghetti but really you could use any pasta.

Sunday Dinners are back! Happy cooking :)


Wednesday, January 11, 2012

Mac & Cheese - My Mom

Pasta:
2cups of dried elbow macaroni
Sauce:
1/4 cup of butter
2 tablespoons all-purpose flour
2 cups of milk
4 ounces (half a package) of cream cheese, softened
2 teaspoons of Dijon mustard
1 package of yellow cheddar cheese; half shredded half cubed
1 package of white cheddar cheese; half shredded half cubed
salt, eyeball it
pepper, eyeball it
Topping:
1 cup of bread crumbs, i use the Italian seasoned
2 tablespoons of butter

Heat the oven to 400*. Cook the macaroni according to its directions.
While that is going on, melt the 1/4 cup of butter in a saucepan until sizzlng, stir in flour. Cook over medium heat, stir until the flour is smooth and bubbly in the butter. Add milk, mustard, salt and pepper. Add cream cheese (i like to cube it to make it easier to melt). When the cream cheese has melted, add the white and yellow shredded cheese. Stir until melted.
Add cheese cubes to the cooked and drained macaroni. Add sauce and stir together. Pour into a baking pan/casserole ungreased.
Add crumb topping (which is stirred in a small bowl). Bake for about 20mins/until golden brown.

Homemade Mac & Cheese is the best. I used to make this all the time for my roommates in college, they used to plan other meal items around this. My mom modified this from another recipe and its definitely hard to stop eating. With it being so cold, it was great to have comfort food :) 
My only suggestion is to not use deli cheese. I use Cabot, deli cheese seems to be really salty and it gives it a weird taste. I always use a little less salt or pepper because someone can always add more.